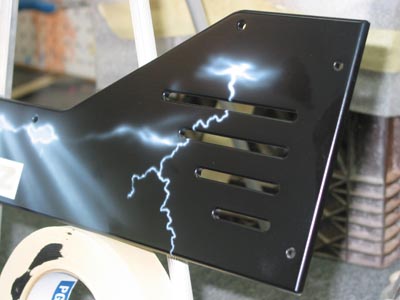
For the Better Life Foundation’s Katrina Relief Concert
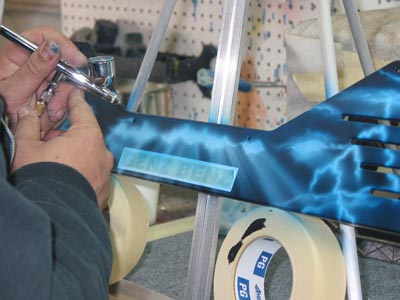
The piece that you will see here is a Genz Benz amp cover. It was recently donated to a concert benefitting Katrina victims. The Band 3 Doors Down is from the stricken area and they organized and headlined this event.
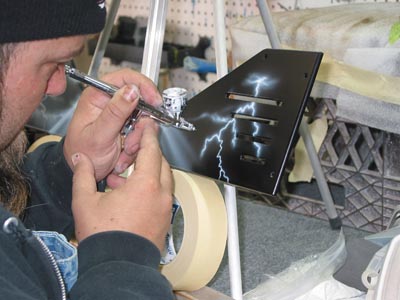
Lightening is one of the easiest effects you can do with an airbrush, but since I get asked about it all the time, I thought I would take this opportunity to put together a tutorial. This is a GREAT exercise for beginners.
1 & 2. As usual, I will start with a well reduced and strained white paint. I always start my paintings by defining the light source and then work from the lightest areas out to the darkest. Here you can see that I have started with the brightest area – where the lightening is coming through the stormy sky and creating an illumination of the clouds around it. The initial layout of the lightening should be created with a very tight flood stroke. Allow yourself to be random and do not over-think the lines and placement. Lightening is generally a very irregular line with a lot of kinks and bends. One thing that should remain consistency, however, is the rough thickness of the line and the intense value of the white.
3. Once the lightening is defined by the flood stroke, I will go over it again, giving it a "haze". Basically I will outline, or trace the flood stroke with a lighter and softer stroke.
4. I then add the clouds around the lightening using lighter strokes. Always keeping in mind the source of light and how the lightening itself will illuminate the clouds as it passes through. Towards the center of the piece I wanted to give the appearance of some very bright light coming through the store clouds. A scene like this is somewhat stylized, as you will not often find something like this in nature. Because of this I am not using any reference photos for this particular mural, I am simply following the general rules of light and secondary illumination.

5. There you can see most the initial white, or under painting complete and ready for kandy. We will go back in and enhance the white later in the process.
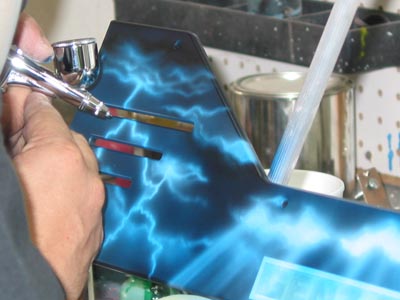
6. Once the under painting is complete, I use a transparent kandy blue mixed in an intermediate clear to go over most of the white. I follow the edge of the clouds and allow the "overs pray" to work to my advantage providing a very smooth and subtle transition between dark and light.
7. When the blue is laid down, I create a mixture of blue, transparent black and a skosh of purple to give me a darker hue. With this darker color, I will go in and "carve out" the clouds, working the negative space.
8 & 9. As you work with this dark color, it is crucial to follow the rules of light. You need to remember where your primary and secondary lighting sources are and shadow accordingly. Consistency in light is critical.
10 & 11. Here I am using some of the darker color to help define the bands of light that are coming through the clouds. I am using only freehand strokes here, with no shielding. I want the transitions to be very soft, and adding a hard line here would not be natural.
12. Once the shadowing is complete, I just need to go back into the mural and add highlights and accents to further define the light source.
13. You do not want your white spitting at this phase of the mural. Make sure that your paint is mixed properly. If you do not have a good mix, you will end up with some bad lines. Here the highlights are placed exactly along the first lines that I laid out for the lightening. I do not add any other "bolts" at this time, I am simply redefining what I laid out in the first step underneath the kandy.

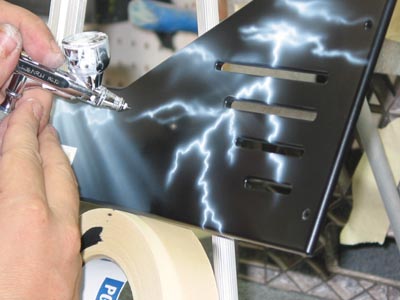
14. Here is a detail shot of the highlighting stroke.
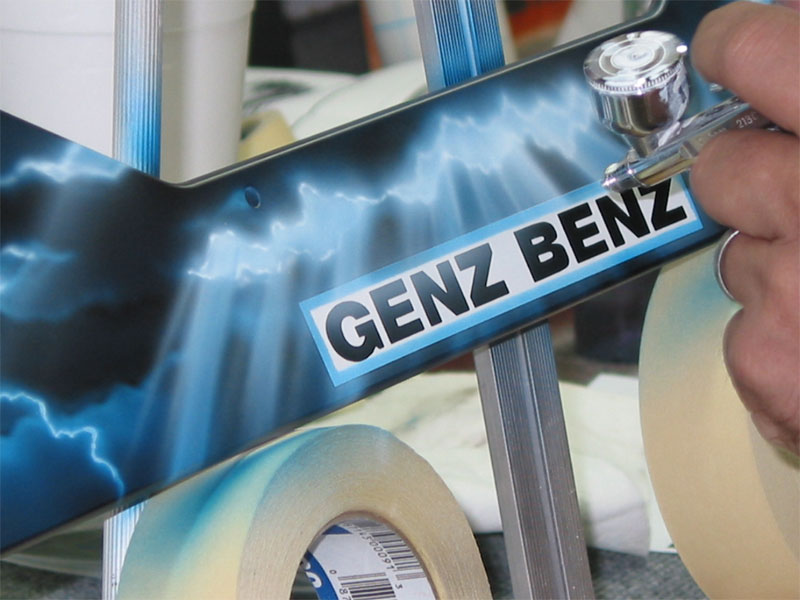
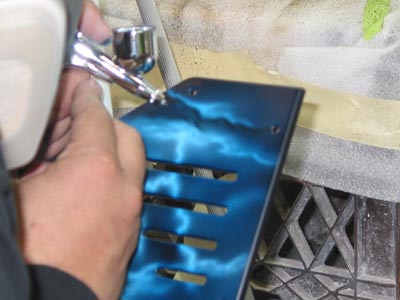
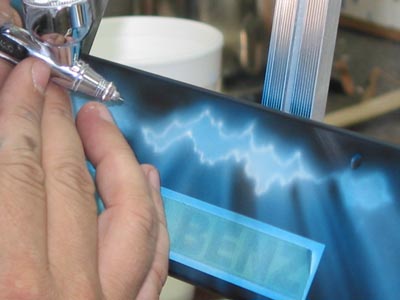
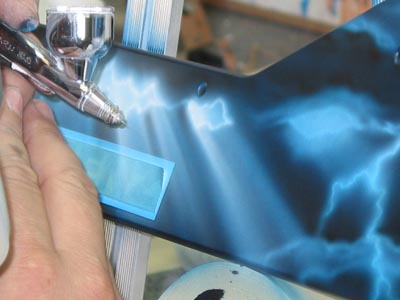
15. I am now enhancing the edge of the clouds where the light is peering through. Also at this point in time I will do the airbrushing inside the lettering.

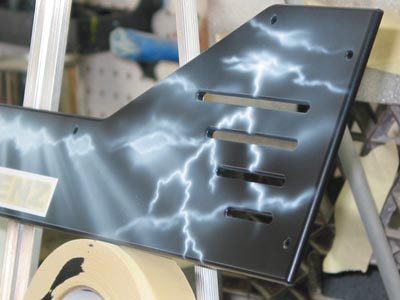
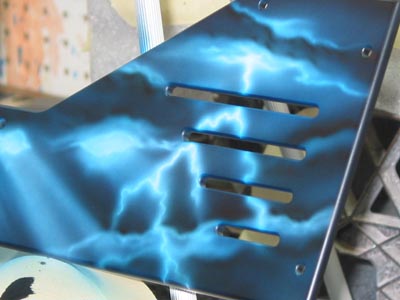
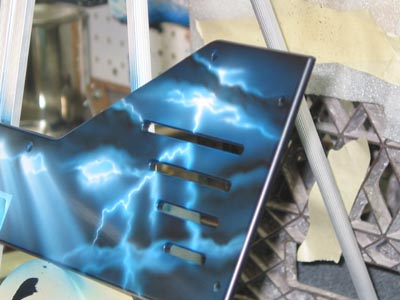
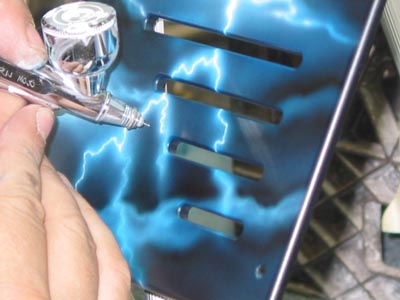
Here is how the whole piece looks. It was then cleared and sent back to the factory for final assembly. Hopefully we will get a final complete shot sometime!