This customer requested a pirate theme for his paint work and really left the details of the job up to me. I really like to work with core shadow as a basis for building a composition and as a basis for exemplifying how light sources affect an image. The basic idea for the image came from Pirates of the Caribbean and the imagery of the pirate changing from “alive” to skeletal. Let’s get started!!

I start all my mural work with a light sketch on the surface using a Stabilo Chalk pencil. I then get out the airbrush and very loosely re-sketch the image with my brush. My basic idea is that the pirate is half “human”, half skeletal and the division point falls along the core shadow of the face.
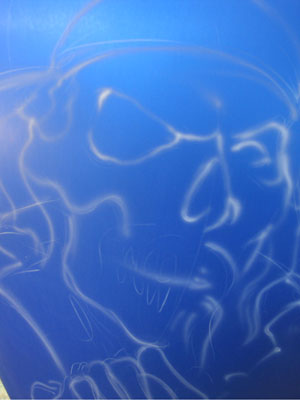
Here you can see some of the chalk pencil of the original sketch. To get started I just give myself a general idea of the composition. I do not commit to anything this early in the game.
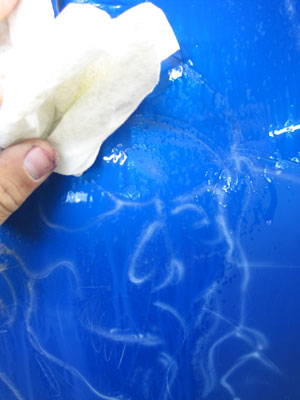
Before I get started with the mural work I completely wipe down the surface with a degreaser. I prefer the Spies Hecker brand. You never want to start your mural work on top of Stabilo or chalk lines. These lines will keep the color from adhering to the surface and you will have problems later in the process.
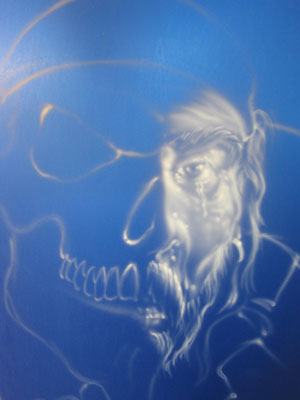
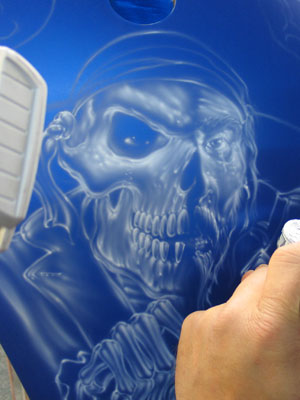
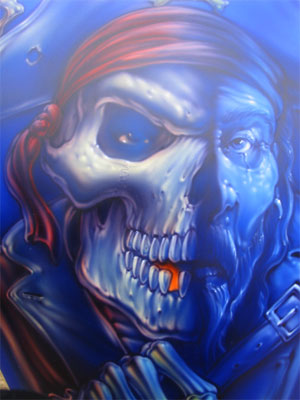
I begin working out the composition in white. Working from left side first I begin to develop the features of the “guy”. He is quite rugged looking with his mustache and ruddy complexion. I will have some fun with skin textures as I move along. Notice how the white underpainting is providing the contrast and detail work even at this early stage in the painting. The brightest areas, some with a value of nearly 100% transition into the darker areas where the value of white may go to almost 0%.
Notice that I am following a set shape for the bone structure of the entire head, however only the right side has flesh. The way the white has been laid down establishes that we have very strong light sources coming from both sides of the painting, creating a very strong core shadow vertically down the front center of the head. I am utilizing the strong core shadow to divide the face into its fleshy and boney halves.
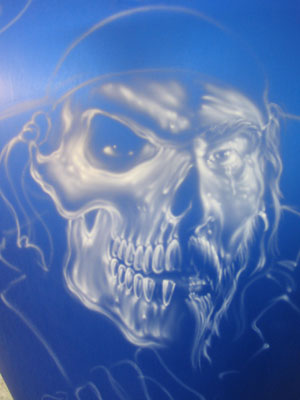
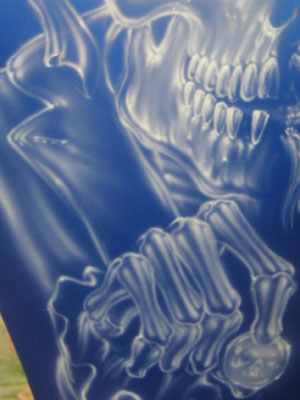
When doing a project like this it is important to maintain consistency not only in the light sources, but in the shape of the skull. Even though one side is bone and the other has fleshy features, the symmetry of basic shape is necessary to pull this off effectively. By this I am referring to the eye sockets, cheek bones, jaw line and nose and how they are consistent across both sides of the head.

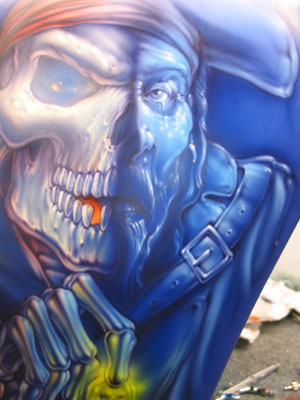
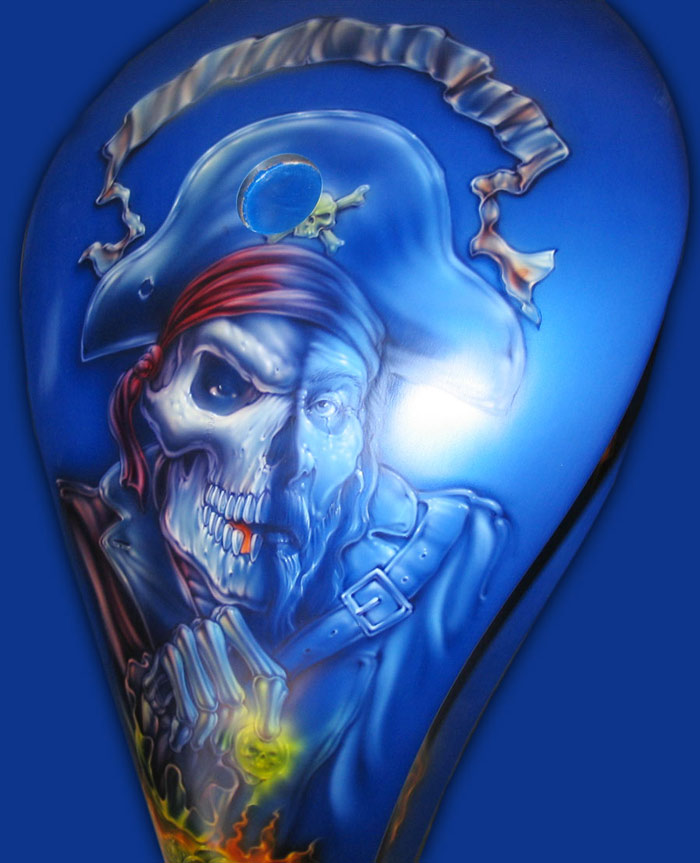
Moving from the facial features that I am focussing on in this lesson, I completed the composition with a hat, added some cloth textures with his jacket and bandana and I gave the pirate a “piece of 8” to pose with. He He He.
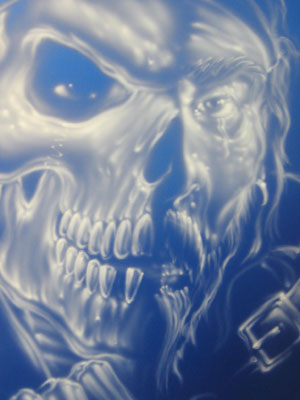
Here is an image of the white underpainting completed. Take a few minutes to thoroughly study the underpainting. Notice how the light sources have been established and how each shape in the composition has its own core shadow. The white has defined the shape and volume of each of the elements of the design. By looking at the design as a whole, you can see that items that are closer to you in the composition are brighter with sharper contrast, while softer edges push an item back in the painting.
I cannot stress the importance of the underpainting enough. Before you put color in your brush you should be completely satisfied with the way your composition is laid out and defined by just the white. You should have a wide range of tone and all your key elements should be in place, and have the volume shape and contrast that you have envisioned.

I am now ready for color. To add dramatic effect to this piece, I am going to have the left side be quite illuminated with the right side in the shadows, monochromatic and nearly melting into the background. Starting with Color Horizons Sunrise, I placed my yellow color washes. Notice there is a strong gold reflection from below where the treasure chest of gold is shining.
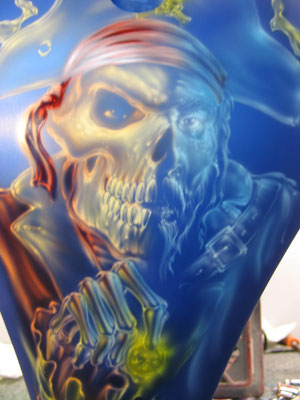
Since the values have all been set in white, I really only need to do light color washes, hitting the intensity just a bit more in the areas of the highest contrast. I moved from sunrise to tangerine for the tones in the skull and on to apple red for the bandana and the body of the jacket.
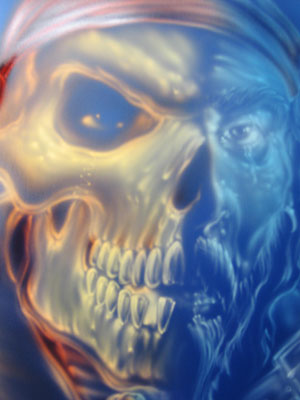
The right side of the skull gets only a light wash of blue. No other colors are used on this side. Notice how the core shadows play their role in dividing the dualing light sources and establish a very dramatic effect.
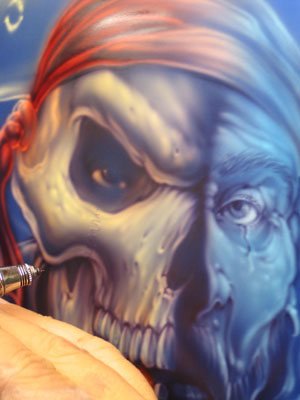
With all the color washes in place, I am ready to hit the detail. I mixed a combination of purple and black. All the detail will be done with this color. I now go back through the entire piece and re-establish the detail, carving out the objects that have already been formed with the white.
As always I am just following the guidelines that have were laid out in the underpainting. The detail color works more in the negative spaces and simply re-defines the features and characteristics of the composition that were lost with the color washes.

The dark color is used to further define the textures and shadows in the mural. Notice again how each and every shape on the pirate’s face has its own set of core shadows that define its appearance and creates the contours of the face, brow, nose teeth, cheek and jawlines.

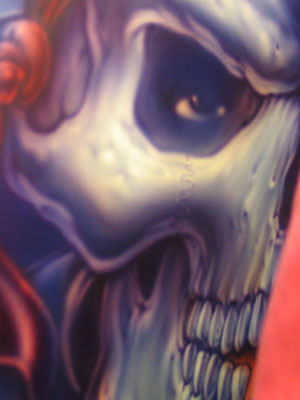
Once the detail work is complete, the only thing left is to go back in with the white to hit the final highlights.
Again I am just redefining the areas of highest contrast that were established back in the beginning.
I use the highlights to exaggerate some of the unusual skin textures and give the eyes a piercing stare.
I am very sorry to report that we do not have final shots of this bike, or even shots in clear which would really bring the whole thing together. This was one of those jobs on a ridiculous timeline .. where the builder was in the parking lot loading pieces as we were buffing them out. I am sure many of you understand!!
Mike did a video along with this how to: