For those of you who do not know it, in Mike’s “spare” time, he builds custom guitars and currently has a patent pending on a new guitar style. While we are waiting for patent protection before we begin production on that particular model, Mike has decided to start a new series of custom one-off electric guitars based on his own unique body style. This is the first in a series of 12, all of which will have wildly airbrushed finishes. We thought it would make a good how to!
This guitar was prepped using polyesther and a urethane basecoat. It was then sanded down with 320 grit and scotchbrited where needed.
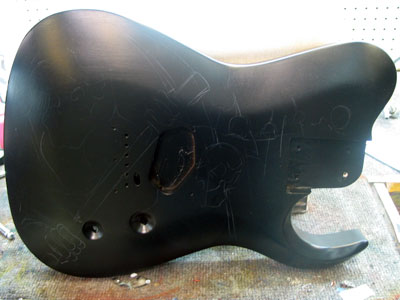
1. Using a white stabilo pencil I loosely sketch out my design. Just enough to give me a composition guide to follow with my airbrush. The stabilo lines will need to be cleaned off before any major painting goes on.
2. Next I use my white and go over the stabilo and lay out my design and composition loosely. Once that is done, I use a water born degreaser to clean all the stabilo off the surface. Before you really get into laying down the base, you want to make sure that the surface is very clean and all traces of the stabilo are gone. Once this is done, you are ready to start developing the piece.
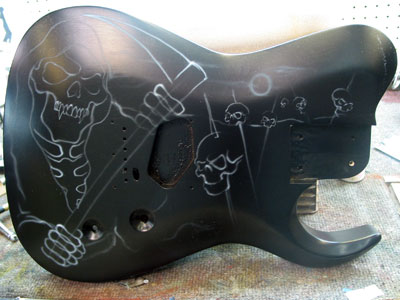
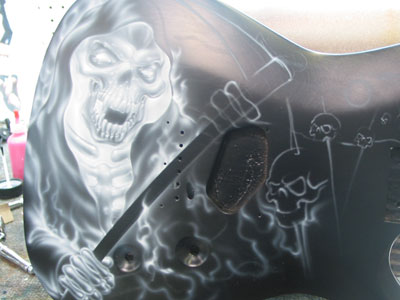
3. I begin with the reaper using the white – well reduced. The reduction and viscosity of your paint is crucial. You want to make sure that it is thin enough that you can build your values of white slowly, without sputter. I also recommend straining your white through a fine screen. I like to start working the areas with the most extreme highlights and move out from there, so I am going to start around the skull. One thing that I want to accomplish with this piece is to give the appearance that the cloak is illuminated from within. I am not working from any reference for this piece. Just kind of “winging it” from my head.
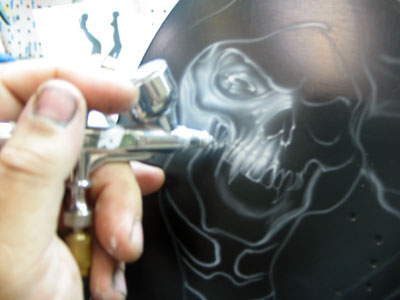
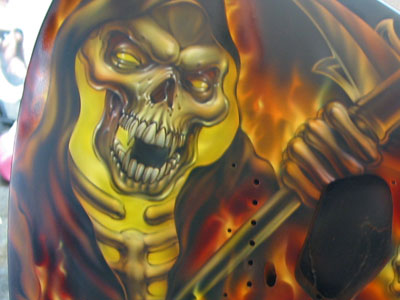
4. Here you can see how I have just about completed the facial area. Notice how intense the lighting is around the skull. I do this to really make it pop out of the background.
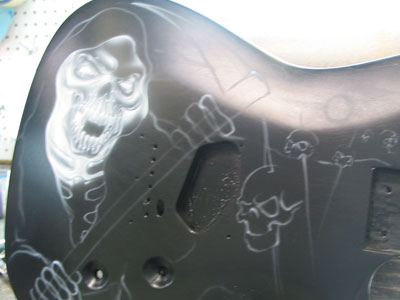
5. Here we are moving along developing the shading in the cloak. I used a piece of tape while working on the cloak to really define the sickle handle while I was working on the white areas around it. Remember that hard line masking “carves” items out of their backgrounds more than soft shielding. I use a strategic combination of the 2 methods to achieve depth and shape in any design.
6. Next I begin to work the flames. I am being very cautious of the scale and direction of the flames in this piece. I want them to be going somewhat vertical as the guitar was being played. While working on the base for the flames, I used a lose hand shield occasionally to define some of the flame edges.

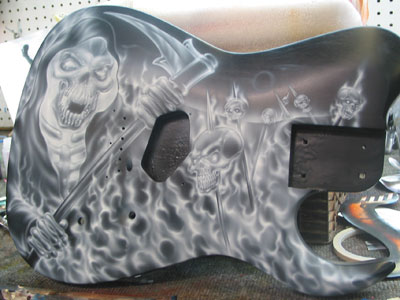
7. Here is a close up shot of the white, just before I will begin working with some kandy colors. Notice how much white was used. Don’t be afraid of the white! The base is what defines the light and contrast of the design and should be the part that you spend the most time developing. While working the white, pay attention to things that you want to pop and be aware of how light reflects off of hard and soft objects. In this piece, notice the hard lines used to define the posts and sickle as opposed to the softer transitions of the fire and cloak. See how the hard shielding was used to provide severe contrasts. Once you have completed the white, you need to wipe down your piece and tack off. You do not want dried paint left on the design as you move into the color portion of the project.
8. Time for color!! Beginning with the SEM Sunrise kandy I lightly coat over most of the piece and put a good portion of kandy inside the cloak. As I move towards the flames, I want to get a good coat of kandy in that area to begin developing some of the brilliance. When working with kandy for color, you want to make sure that it is well reduced. I mix my spraying kandies down to about 20%.
9. I begin my initial shading with kandy red. Notice how I am applying the red over a lot of the dark areas. The red will not appear very brilliant because there is not much white underneath it. It produces something more of a brownish in the skull areas, and this is the look I am going for. In reality, I am using the white as a negative guide for this particular “wash” of color.

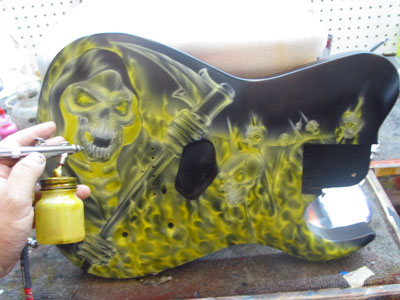
10. Using SEM kandy tangerine orange inside Spies 8560 I have washed over the flames, making sure that you can still see some of the yellow throughout the burning area.
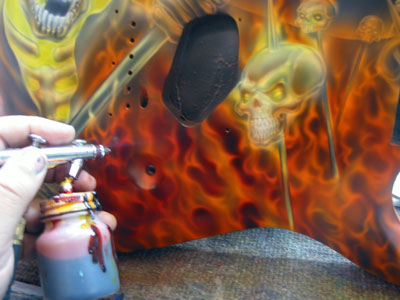
11. Next I am going back in with the kandy red and “cutting out” some of the negative flames, developing them so they have a little bit more illusion of depth.
12. Using a well-reduced mixture of purple and black, I begin to define the details and “chisel out” the work using loose hand shielding.

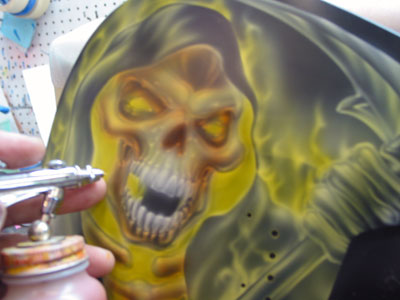
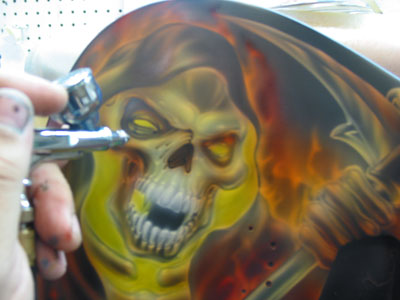
13. Here you can see the reapers’ head pretty much finished. Notice that I have not deviated from my original white guideline. The colors were used to define what was originally mapped out in white.
14. Moving along. . . This is what the piece looks like with the development of the darker color defining the contrast.
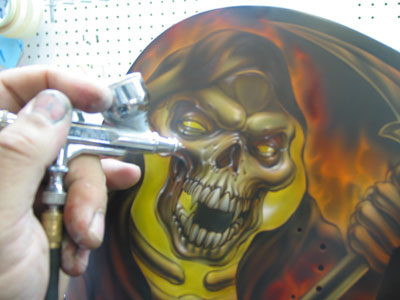
15. Once the detail work is completed, it is time to go back in with my white to redefine and create the highlights. Notice that you see very little, if any, bleed back of the kandy into the highlight white. This is why I stress the proper mixing of kandy used for airbrushing. I always mix my airbrush kandies at 20%.
I use quite a bit of loose hand shielding during the highlight stage. Very often, if I used a shield to develop and area, I will use the same shield at this time and blow the highlight back in the opposite direction.
16. Here you can see how I have added white highlights and emphasized certain areas of the flames and then I went back over them with the kandy SEM sunrise.
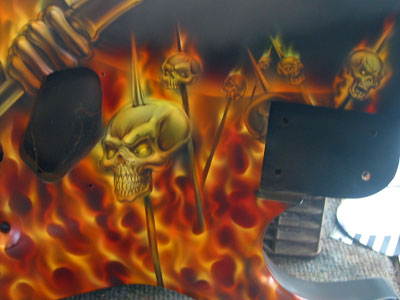
17. This is a close up of the detail in the field of skulls on sticks.
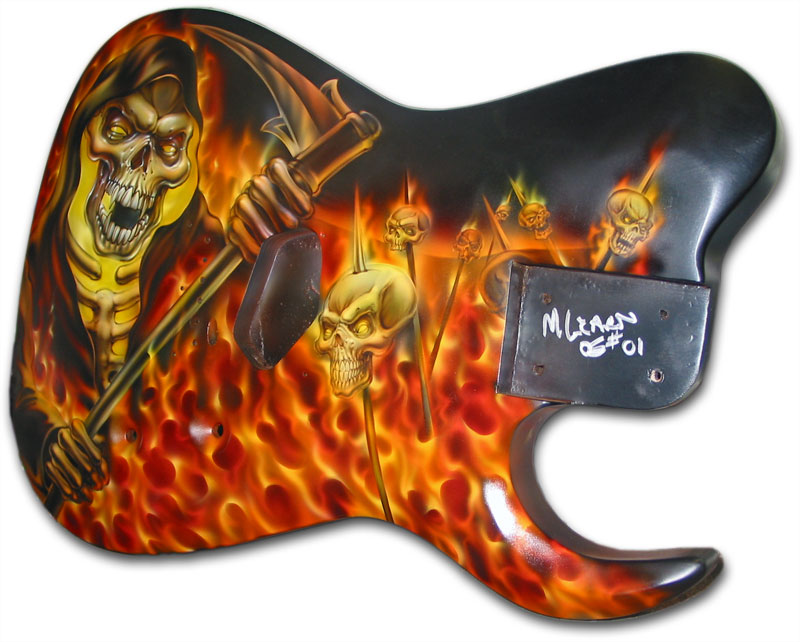
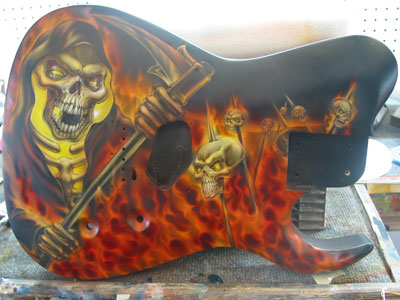
18. Final shot just before clear. Notice how the flames all work together to produce a sense of depth. This is built up through all the layers of kandy.

Here it is kandied, cleared, buffed, all put back together and READY TO ROCK.