We have had a lot of requests for a How To on beveled tribal graphics. The following technique is a really simple way to go about it.
The tribal graphics were created in CorelDRAW. Once the shape was finessed, an 1/8″ contour was added and the file printed. For this project, we first painted the bike silver, then applied the graphics. There are a couple reasons why we like to do it this way. Spaying black then the silver graphics always seems to end up contaminating the black with silver overspray. This way is just cleaner and less troublesome. Black covers very well over a silver ground coat.

1. Once the bike is in black, We are ready to start the artwork. For added depth and design, we have chosen to add a background texture inside the “framework” of the tribal. This is a quick purple perl sprayed through a fishnet stocking. Once that is finished, the first thing we will weed out is the contour cut or the bevel, on the tribal art.
A contour cut of 1/8″ gives you an area to work with that is easy to control, and you can shade on the darker side without getting color all over the place.
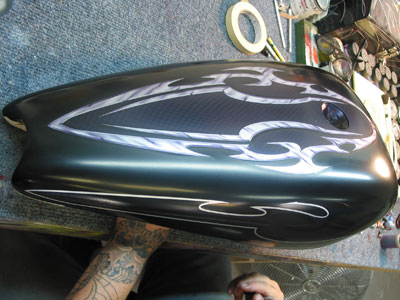
2. In this picture you can see that the artwork on the top of the tank is done and you get an idea of where we are heading with the tutorial.
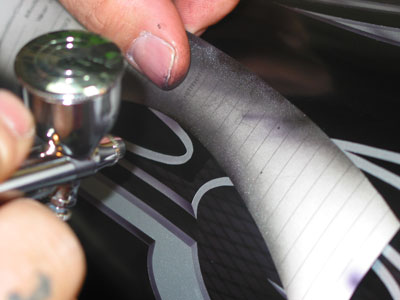
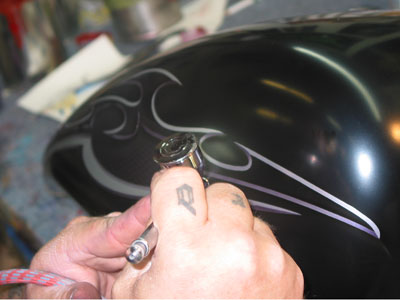
3. & 4. Time to start bevelling! Using a loose hand shield we will create the edge of the bevel based upon where the light source is. For this piece we have chosen to use a transparent purple mixed in black. Since it is transparent a little bit of overspray is not a problem.
Create your shadows and highlights according you your light source and keep it consistent. Our source is from above so the top portions of the bevel will be highlighted and the bottom shadowed. To create the shadow, I use a shield and a dagger stroke aimed right at the edge of the template.
On the highlighted edge you need to spray very lightly, just to make sure the bevel is defined from the rest of the graphic when it is unmasked.
5. Here is an example of how to use a shield to control overspray.
6. Here we are adding shading that does not require masking, the shadow along the bottom edge.
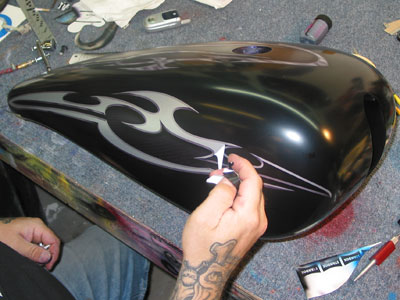
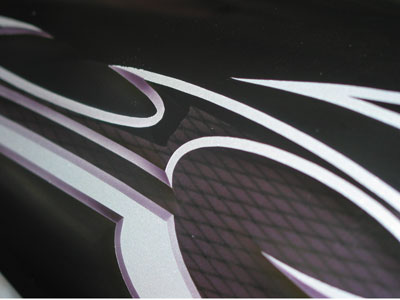
7. After you have ghosted your highlighted edge, go ahead and peel the center portion of the design.

8. Here is what it should look like. Notice how subtle the color is on the highlighted edge. It is really there as a reference line for later.
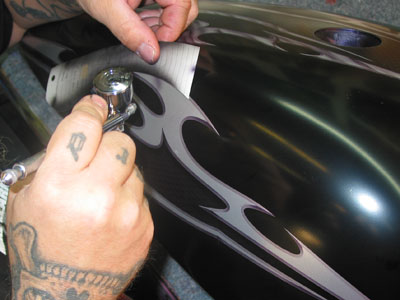
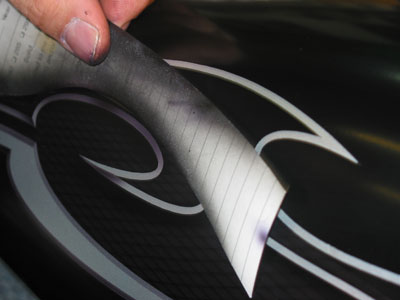
9. Now using the freehand shield, come back in off the edge that you created from ghosting the highlight, and start to create the effects or dynamic detail that you wish to achieve. You can do it subtly with fading or weathered with cracks and gouges, or anything in between.
10. The shield I use is rather generic, much like a french curve. This will usually accommodate all the curves of my design. We use spray out cards and cut our own masks as needed.
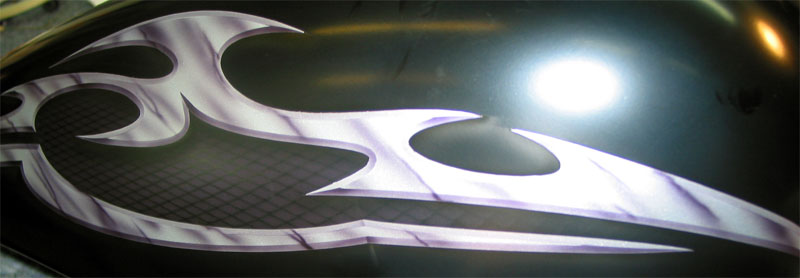
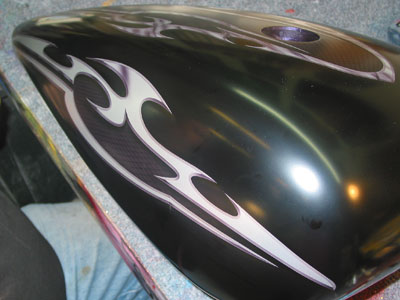
11. Here it is, pretty much all finished up. You can add highlights, we chose not to with this particular design, wanting to keep it on the dark side. If you chose to highlight, make sure you use a well reduced white and you will need to be very careful not to get white overspray on the rest of the piece.
This style of graphic is extremely popular and very versatile. You can make a lot of cool designs quickly on the computer and execute them rather quickly as well. As you can see, you can get away with no pinstriping, or add stripes and another layer of depth and detail. This type of graphic also works as a very nice frame for a piece of freehand airbrush. The possibilities are really endless and the results are stunning.